Case 7. Custom Protocol Groups
Standard Protocol Groups are used for applying policies and generating QoE reports.
The interface provides two mechanisms for reorganizing standard protocol groups:
- User Groups of Protocols
This option is used when you need to combine a set of protocols into a group for quicker policy assignment in the future. In this case, the standard protocol groups will not be overwritten in any part of the system. - Protocol Group Management
This option is used when you need to create a new group (e.g., from custom protocols) or modify the composition of protocols within a standard group. The names of standard groups can also be edited.
All changes will be reflected throughout the interface, including in QoE reports.
User Groups of Protocols
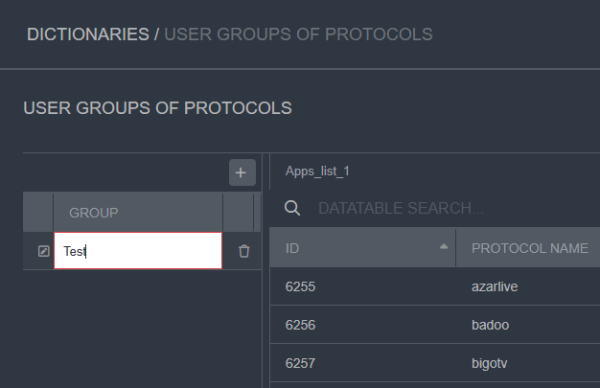
Creating a protocol group is done in the section Dictionaries → Protocol Groups.
- Click the + button above the “Group” field.
- In the pop-up field, enter the name of the group.
- Add protocols to the group. This can be done in several ways:
- Button for moving individual protocols.
Next to each protocol, there is a < or > button for movement.
The button for protocols in the “Available Protocols” table is located on the left and moves the protocol to the User Group table when clicked. The button for the protocol in the User Group table is on the right and moves the protocol back to the “Available Protocols” table when clicked.

- Buttons to manage the movement of one, several, or all protocols.
Between the protocol tables, there are buttons to control the movement of protocols:
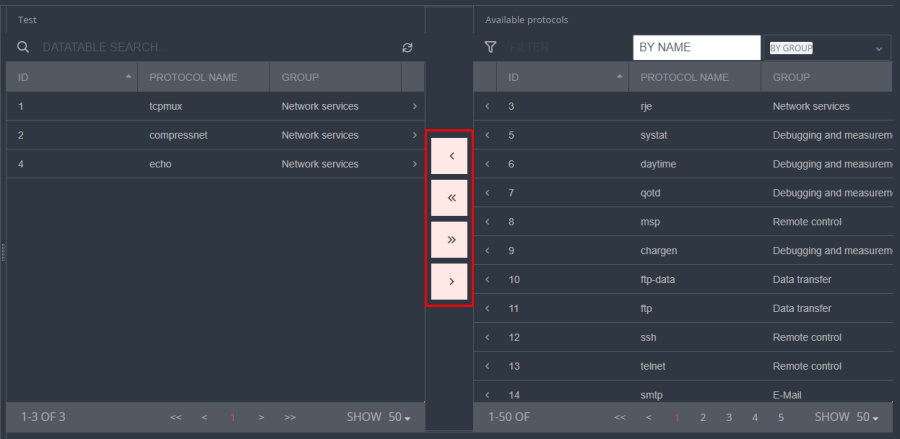
By holding the Shift key, you can select multiple entries in the table.- The first button moves the selected protocol(s) from the “Available Protocols” table to the User Protocol Group table.
- The second button moves all protocols from the “Available Protocols” table to the User Protocols Group table.
- The third button moves all protocols from the User Protocol Group table back to the “Available Protocols” table.
- The fourth button moves the selected protocol(s) from the User Protocol Group table back to the “Available Protocols” table.
- Drag-and-drop.
One or more protocols can be dragged from one table to another by holding the mouse button.
Additionally, protocols in the “Available Protocols” table can be filtered by built-in groups and searched by protocol name.

After configuring the User Protocol Group, you must save it by clicking the “Save Changes” button at the bottom of the screen.
The “Cancel Recent Changes” button undoes all actions taken since the last save of the User Protocol Group.
The “Clear All” button removes all protocols from the User Protocol Group.
Applying Policies to User Protocol Groups
This case is described in Case 2. Applying Policies to Channels, Session Policing for Channels and Subscribers → Step 2. Adding a New Policy.
Protocol group management

Protocol groups have the following identifiers:
- 1 to 32 are used for standard (cloud) groups
- 1000 and above — used for custom groups
Setup
Step 1 – Creating a Group
Go to Custom Protocols → Custom Protocol Groups and click the “+” button in the “Groups” column.
You can either override a standard group or create a new one.

- For Cloud Groups:
- Select the desired group
- If needed, edit the group name
- Click “Save”
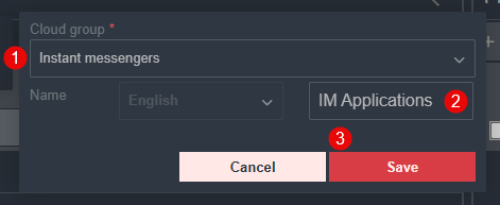
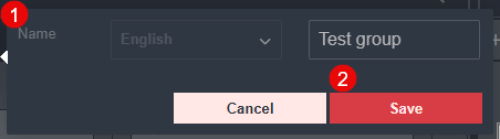
- For a Custom Group:
- Enter the group name
- Click “Save”
Step 2 – Adding Protocols
Select the created group and click the “+” button in the “Protocols” column.
You can add both custom and built-in (cloud) protocols.

After selecting the protocol, click “Save”. The protocol will be added to the group.
The created group will be available across all sections of the interface.